Easy Paper Wisteria: Step-by-Step Origami Flowers
Paper wisteria is such a beautiful and delicate flower, and in this tutorial, I’m going to show you how to create your very own stunning hanging wisteria display using just paper! Imagine cascades of tiny, intricate purple or pink blossoms tumbling down, bringing a touch of enchanted garden elegance right into your home. This project is perfect for complete beginners, and it’s a fantastic activity for kids too, with a finished piece that makes for a truly thoughtful handmade gift or a breathtaking home decoration. We’ll spend about 30-60 minutes together, depending on how many blooms you decide to craft. You’ll learn simple folding techniques to create these lovely little flowers and discover how to assemble them into beautiful hanging chains. Get ready to bring some floral magic to life!
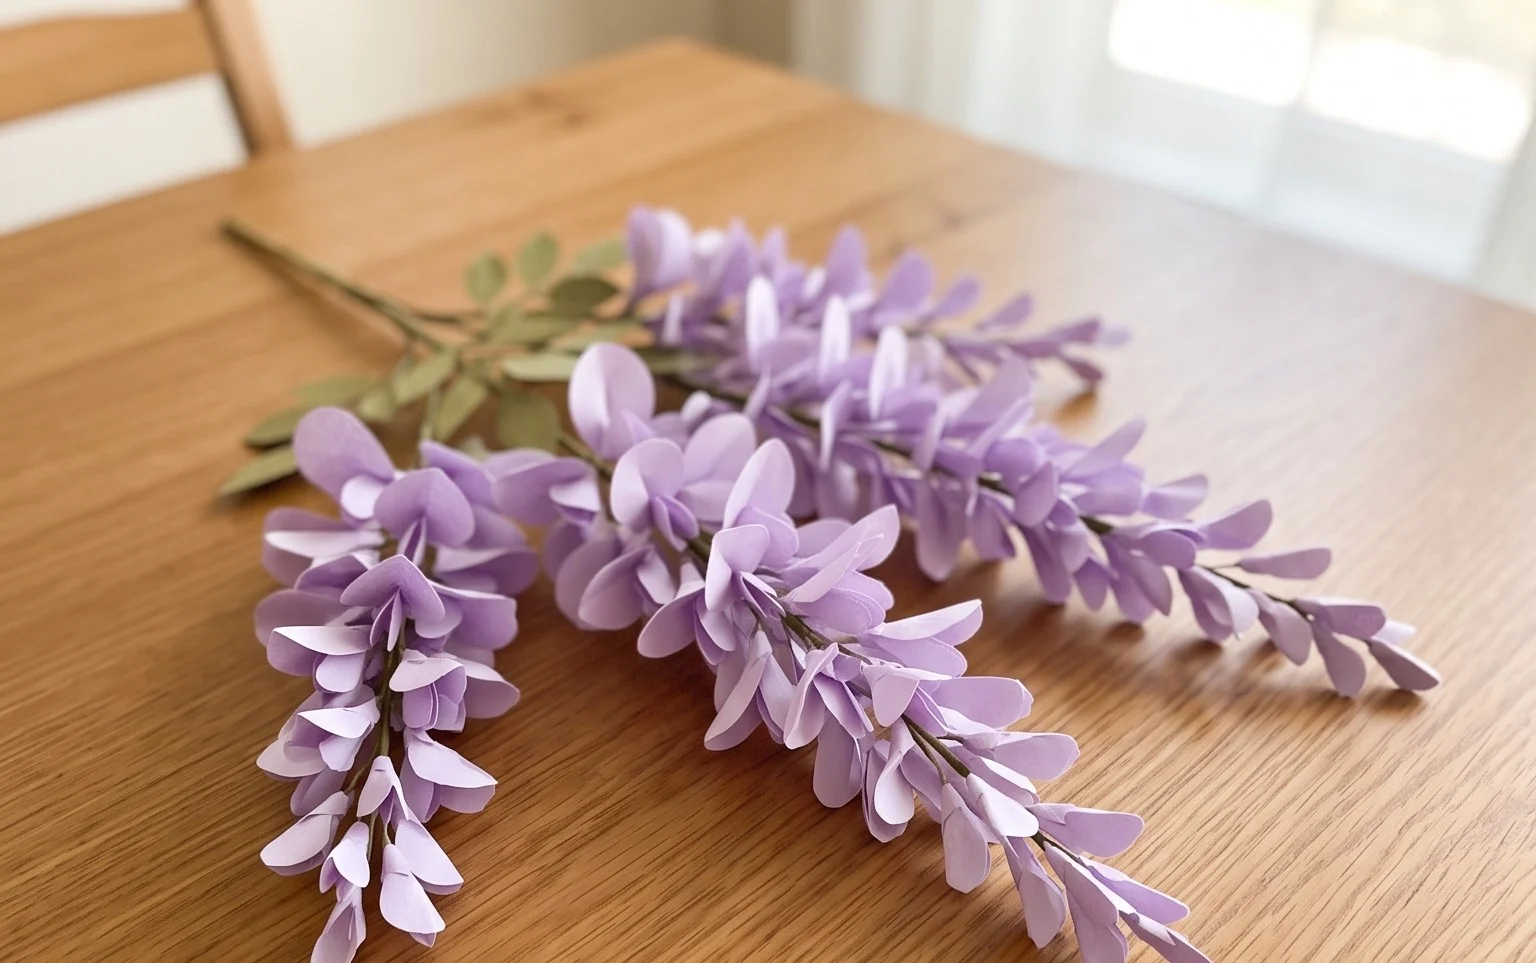
DIY Hanging Paper Wisteria Flowers: A Beginner-Friendly Origami Tutorial
Hello there! Today, we’re going to embark on a delightful crafting journey to create beautiful, cascading paper wisteria flowers. These delicate blooms are surprisingly easy to make with origami, and they add such a lovely touch of color and whimsy to any space. Whether you’re a seasoned origami enthusiast or a complete beginner, I promise you can master this. We’ll go through each step together, and I’ll highlight common pitfalls so you can avoid them. Let’s get started!
Choosing Your Paper: The Foundation of Your Wisteria
The paper you choose will significantly impact the look and feel of your finished wisteria. For this project, I recommend using standard origami paper.
Type and Weight
Origami paper is thin yet strong, which is perfect for intricate folds. It also tends to hold creases beautifully, giving your flowers a crisp, polished look. You can also experiment with other papers like copy paper or thinner cardstock, but be aware that thicker paper will be harder to fold precisely, especially for the smaller details. For a beginner, stick to 70-80 gsm (grams per square meter) if you’re not using dedicated origami paper.
Size
The size of your starting square will determine the size of your individual wisteria blossoms. For a good balance between detail and ease of handling, I suggest starting with squares that are 3 inches (approximately 7.5 cm) or 4 inches (approximately 10 cm) on each side. Larger squares will make bigger flowers, and smaller squares will make tinier, more delicate blossoms. You can cut your own squares from larger sheets of paper if needed.
Single or Double-Sided
This is where you can have a lot of fun with color!
* Single-sided origami paper is fantastic if you want a consistent color on the outside of your petals. The white or plain back will be hidden within the folds.
* Double-sided origami paper, where both sides are colored (or one is colored and the other a coordinating color), can add a subtle depth and dimension to your flowers. The contrasting color peeking through will make your wisteria look even more realistic and vibrant.
For your first few wisteria, I’d recommend using single-sided paper in a beautiful shade of purple, pink, or white. Once you feel comfortable, experiment with double-sided papers for a more complex look!
The Base Folds: Building Blocks of Beauty
Before we dive into the wisteria fold itself, let’s make sure we’re comfortable with a couple of essential origami folds. Clean, precise folds are key to a beautiful finished product.
* **Valley Fold:** This is when you fold the paper towards you, creating a “V” shape. Imagine you’re making a valley.
* **Mountain Fold:** This is the opposite of a valley fold, where you fold the paper away from you, creating an inverted “V” or a peak.
To make these folds cleanly, always align your edges and corners as precisely as possible. Run your fingernail or a bone folder firmly along the crease to make it sharp.
For our wisteria, we’ll be using a foundational fold called the **Water Bomb Base**. Let’s practice making this first.
1. Start with your square piece of paper, colored side up if it’s single-sided.
2. Bring the bottom edge up to meet the top edge, aligning them perfectly. Crease firmly from left to right. You now have a rectangle.
3. Bring the left edge over to meet the right edge, aligning them precisely. Crease firmly from top to bottom. You now have a smaller square.
4. Open up the paper so you can see the creases. You should have a horizontal crease and a vertical crease.
5. Flip the paper over to the white side (or the opposite colored side if using double-sided paper).
6. Bring the bottom right corner up to meet the top left corner, aligning them perfectly. Crease firmly. You now have a diagonal crease.
7. Bring the bottom left corner up to meet the top right corner, aligning them perfectly. Crease firmly. You now have a second diagonal crease.
8. Open the paper up again. You should see an “X” of creases.
9. Now, gently bring the left and right edges inwards towards the center, pushing down the top point. The diagonal creases will naturally want to fold inwards. As you bring the sides in, the top point will come down to meet the bottom point, collapsing the paper into a square with four flaps. This is your Water Bomb Base.
It might take a couple of tries to get the Water Bomb Base to collapse neatly. Don’t worry if it’s not perfect the first time. The key is to let the creases guide the paper.
Step-by-Step Wisteria Blossom Fold
Now that we have our Water Bomb Base, let’s transform it into a beautiful wisteria blossom!
1. Start with your Water Bomb Base. You should have a square with four flaps, with the open edges at the bottom.
2. Position the Water Bomb Base so that the open edges are facing you.
3. Take the top layer of the right flap and bring its bottom edge up to meet the very top point of the square. Align it precisely and crease.
4. Repeat step 3 with the top layer of the left flap. Bring its bottom edge up to meet the top point. Crease.
5. You should now have a shape that looks a bit like a kite with two additional flaps at the bottom.
6. Now, take the right edge of the right flap you just folded and bring it over to meet the center vertical crease. Align it perfectly and crease.
7. Repeat step 6 with the left edge of the left flap. Bring it over to meet the center vertical crease. Align it perfectly and crease. Your paper should now look like a narrower kite.
8. Now, we’re going to fold these newly created flaps *backwards*. Take the right flap you just folded to the center and fold it back away from you along the crease you just made. Crease firmly.
9. Repeat step 8 with the left flap. Fold it back away from you along its crease. Crease firmly.
10. You should now have a more streamlined shape. Let’s flip the entire model over to the other side.
11. Repeat steps 3 through 9 on this side.
* Bring the bottom edge of the top right flap up to meet the top point. Crease.
* Bring the bottom edge of the top left flap up to meet the top point. Crease.
* Bring the right edge of the right flap over to meet the center vertical crease. Crease.
* Bring the left edge of the left flap over to meet the center vertical crease. Crease.
* Fold the right flap back away from you along its crease. Crease.
* Fold the left flap back away from you along its crease. Crease.
12. Flip the model back over to the side where you made the initial “kite” folds. You should have a symmetrical shape with four points at the top and a single point at the bottom.
13. Look at the bottom point. You’ll see four little flaps. Gently pull apart the top two layers of this bottom point.
14. As you pull these two layers apart, the paper will naturally want to open up. Blow gently into the small opening you’ve created at the bottom. This will inflate the blossom, making it three-dimensional. If you can’t blow into it, gently spread the layers apart with your fingers.
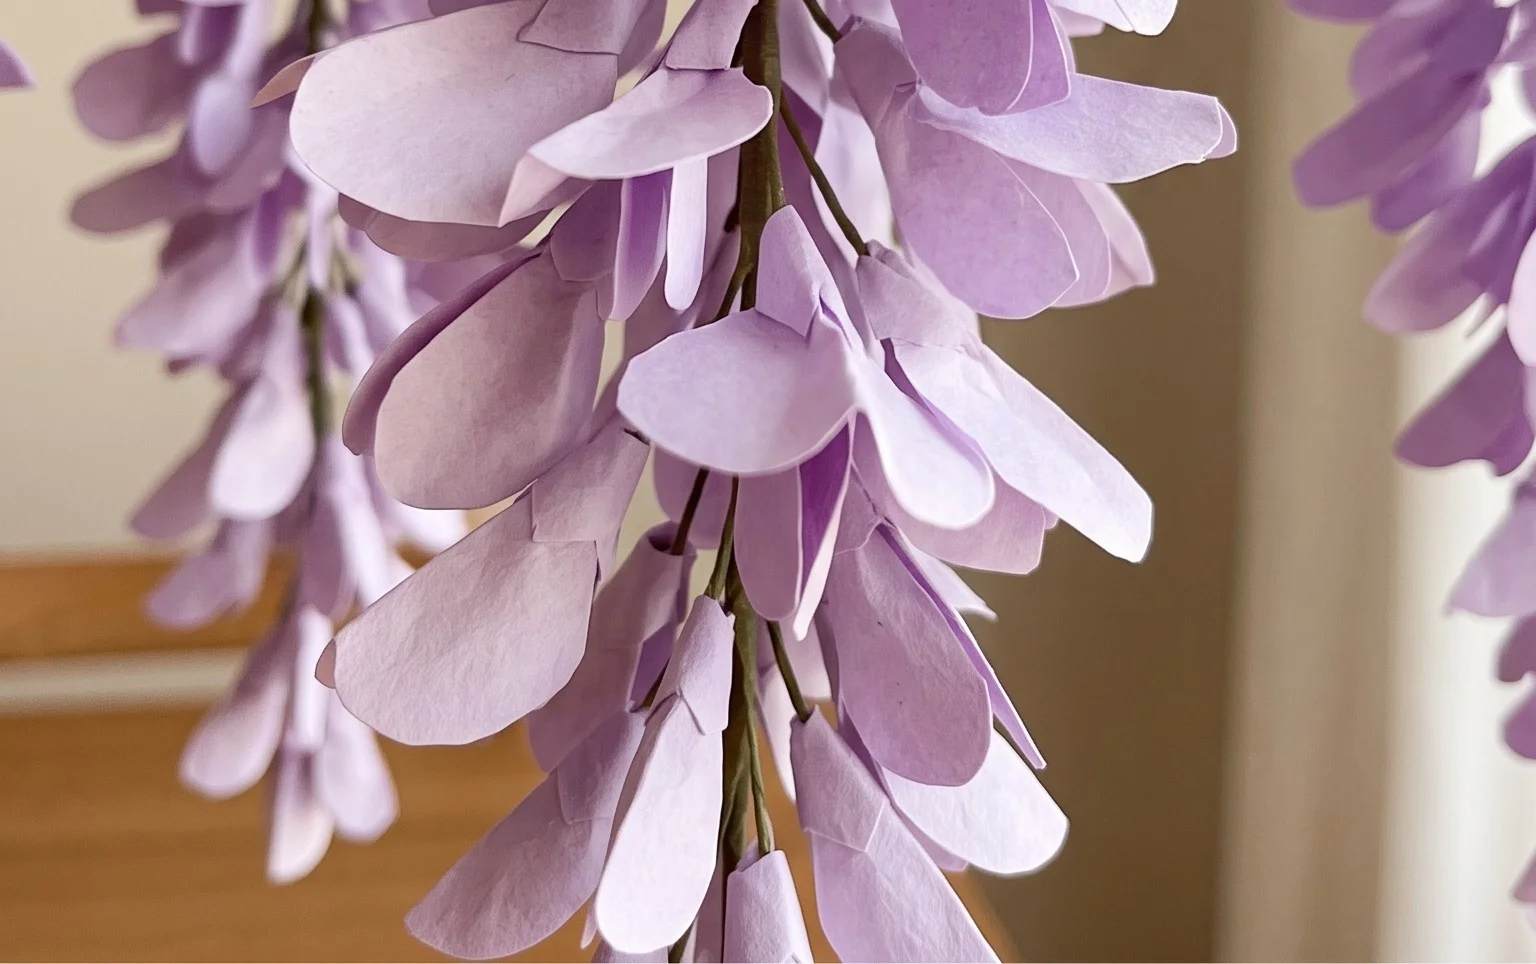
15. You should now have a lovely, puffed-out flower shape. You can gently press the sides to give it a more rounded, flower-like appearance. Congratulations, you’ve made a paper wisteria blossom!
Common Beginner Mistakes and How to Avoid Them
It’s completely normal to encounter a few hiccups when you’re learning a new fold. Here are the places beginners often stumble and how to get past them:
* **Imprecise Creases:** This is the most common issue! If your initial folds for the Water Bomb Base or subsequent folds aren’t perfectly aligned and creased firmly, the later steps won’t work as smoothly.
* *How to avoid:* Take your time. Before you make any crease, ensure the edges and corners are perfectly matched. Run your fingernail firmly along each crease, from one end to the other. Think of it as setting a strong foundation. If a crease isn’t sharp, the paper won’t fold where you want it to.
* **Difficulty Collapsing the Water Bomb Base:** When you get to step 9 of making the Water Bomb Base, trying to get it to collapse neatly can feel awkward.
* *How to avoid:* Trust the creases! The diagonal creases you made are designed to fold inwards (mountain folds) while the horizontal and vertical creases fold outwards (valley folds). Gently guide the sides inwards. Don’t force it. Sometimes, gently pressing down on the top point while bringing the sides in helps. If it seems stuck, unfold slightly, re-crease the guiding lines, and try again. It’s a bit like a puzzle; the paper knows where it wants to go once the creases are right.
* **Not Inflating the Blossom Properly:** If you don’t inflate your wisteria blossom, it will remain flat and won’t have that lovely dimensional quality.
* *How to avoid:* Ensure you’ve pulled apart the correct layers at the bottom point (the top two layers). If you’re struggling to blow air in, try using a toothpick or the tip of a pencil to gently separate the layers a little wider before you try to inflate. Alternatively, just use your fingers to carefully spread the opening and shape the blossom.
Varying Your Wisteria: Unleash Your Creativity!
Once you’ve mastered the basic fold, don’t be afraid to experiment! Here are some ways to make your wisteria even more unique:
* **Size:** As mentioned, start with different sized squares. Tiny blossoms made from 1-inch squares are adorable for miniature arrangements, while larger blossoms from 6-inch squares can be quite striking.
* **Paper Pattern:** Go beyond solid colors! Look for origami paper with floral patterns, subtle gradients, or even geometric designs. A paper with tiny, scattered flowers can create a beautiful layered effect on the wisteria petals.
* **Color Combinations:**
* Use different colors for the “front” and “back” of your double-sided paper. This can create subtle variations in hue as the petals overlap.
* Mix and match colors for your clusters of wisteria. You can create ombre effects by using lighter shades at the top of the vine and darker shades towards the bottom.
* For a whimsical touch, try metallic papers or iridescent papers for a bit of sparkle.
Displaying and Gifting Your Paper Wisteria
Your beautiful paper wisteria can be used in so many ways!
* **Hanging Garlands:** This is the classic wisteria look! String your blossoms together with fine thread or fishing line, leaving a small gap between each one. You can attach them to a longer string or ribbon to create a cascading garland. Hang them from ceilings, doorways, windows, or along mantels.
* **Floral Arrangements:** Create a bouquet of paper wisteria to place in a vase. Mix them with real or artificial greenery for a stunning centerpiece.
* **Gift Toppers:** A few delicate wisteria blossoms tied onto a gift can elevate its presentation from lovely to extraordinary.
* **Scrapbooking and Card Making:** These flowers are perfect for adding a touch of handmade charm to your paper crafts. Glue them onto cards, layouts, or journals.
* **Party Decorations:** Use them to decorate tables, chairs, or as part of a photo booth backdrop for weddings, birthdays, or baby showers.
* **Mobile Creation:** String them onto a craft hoop or branches to create a beautiful, delicate mobile for a nursery or any room.
Making paper wisteria is a wonderfully therapeutic and rewarding craft. I hope you’ve enjoyed this tutorial and feel inspired to create your own stunning floral displays. Happy folding!
Conclusion
Congratulations on completing your beautiful hanging paper wisteria! We hope you enjoyed this delightful origami project. Don’t worry if your first paper wisteria isn’t perfect; remember, every fold is a step towards mastery, and your initial attempt is valuable practice. Once you’ve hung your gorgeous creation, consider sharing a photo with friends or online – we’d love to see your unique take! For your next crafting adventure, why not try creating a cascade in a different color palette, or perhaps experiment with slightly larger paper for a more dramatic effect? There are so many possibilities to explore with origami. We invite you to dive deeper into our collection of paper projects and discover your next favorite creation!
